


In this zwcad indonesia tutorial I will discuss how to use the helix feature to create a spring. First of all, change the view by typing command: vpoint then enter, type 1,1,1, enter
image source : https://zwcad.ardatadesign.com/blog/wp-content/uploads/2018/01/zwcad-helix-1-300x51.jpg
then type command: helix then enter
image source :https://zwcad.ardatadesign.com/blog/wp-content/uploads/2018/01/zwcad-helix-2.jpg
Here we are asked to place the center point or center of the circle of the helix that will be created. Click anywhere or you can also place it at coordinates 0.0 then enter
image source : https://zwcad.ardatadesign.com/blog/wp-content/uploads/2018/01/zwcad-helix-3-296x300.jpg
Then type the lower radius value, for example here I type 50 then enter Type the radius value above it. For example, I also type 50 then enter
image source : https://zwcad.ardatadesign.com/blog/wp-content/uploads/2018/01/zwcad-helix-4-300x40.jpg
Type t (Turn) then enter to enter the number of turns, for example type 10 then enter again
image source : https://zwcad.ardatadesign.com/blog/wp-content/uploads/2018/01/zwcad-helix-5-300x33.jpg
Then enter the height of the spring that we will create, for example, type 100 then enter.
By following the steps above the helix is ready
image source: https://zwcad.ardatadesign.com/blog/wp-content/uploads/2018/01/zwcad-helix-7-274x300.jpg
Now we will make another circle to be the profile of the spring. Type command: circle then press enter Then click anywhere to determine the center point of the circle Then enter the radius of the circle. For example, I typed 1 then enter
image source : https://zwcad.ardatadesign.com/blog/wp-content/uploads/2018/01/zwcad-helix-8-300x33.jpg
The next step is to type the command: sweep then enter Select the circle for the profile then enter
image source: https://zwcad.ardatadesign.com/blog/wp-content/uploads/2018/01/zwcad-helix-9-300x186.jpg
Select the helix to be the path
image source: https://zwcad.ardatadesign.com/blog/wp-content/uploads/2018/01/zwcad-helix-10.jpg
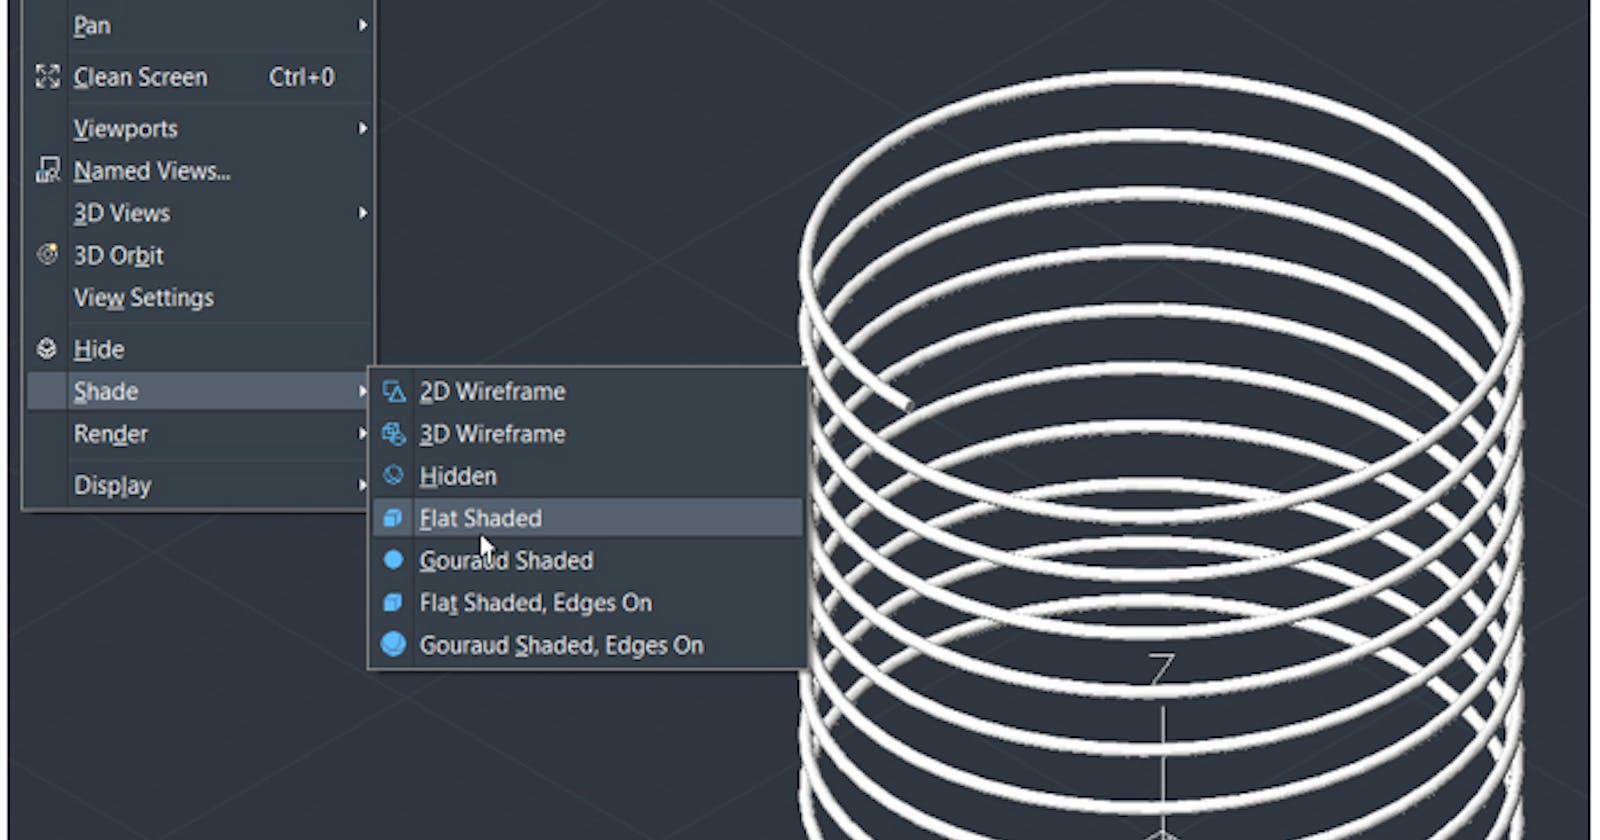
To see the results click on view>Shade>Flat Shaded
image source: https://zwcad.ardatadesign.com/blog/wp-content/uploads/2018/01/zwcad-helix-11.jpg
Hopefully the tutorial above can be useful and help your design activities.